hot dropaggressive
Funfair
Central amusement park with rich loot scattered across fairground rides and buildings. The chaotic terrain of carnival structures creates disorienting close-range combat. One of the map's most exciting and dangerous drops.
Modern Port City — Slides, Coastlines & Fast Flanks
Solara is Free Fire's most contemporary map, set in a vibrant coastal port city with a light-tech, modern aesthetic. Its defining feature is the full-map Slide System — a network of elevated slide tracks that players can ride for rapid traversal between zones. Dynamic weather events and a winding coastline add environmental variety to an already tactically rich battleground.
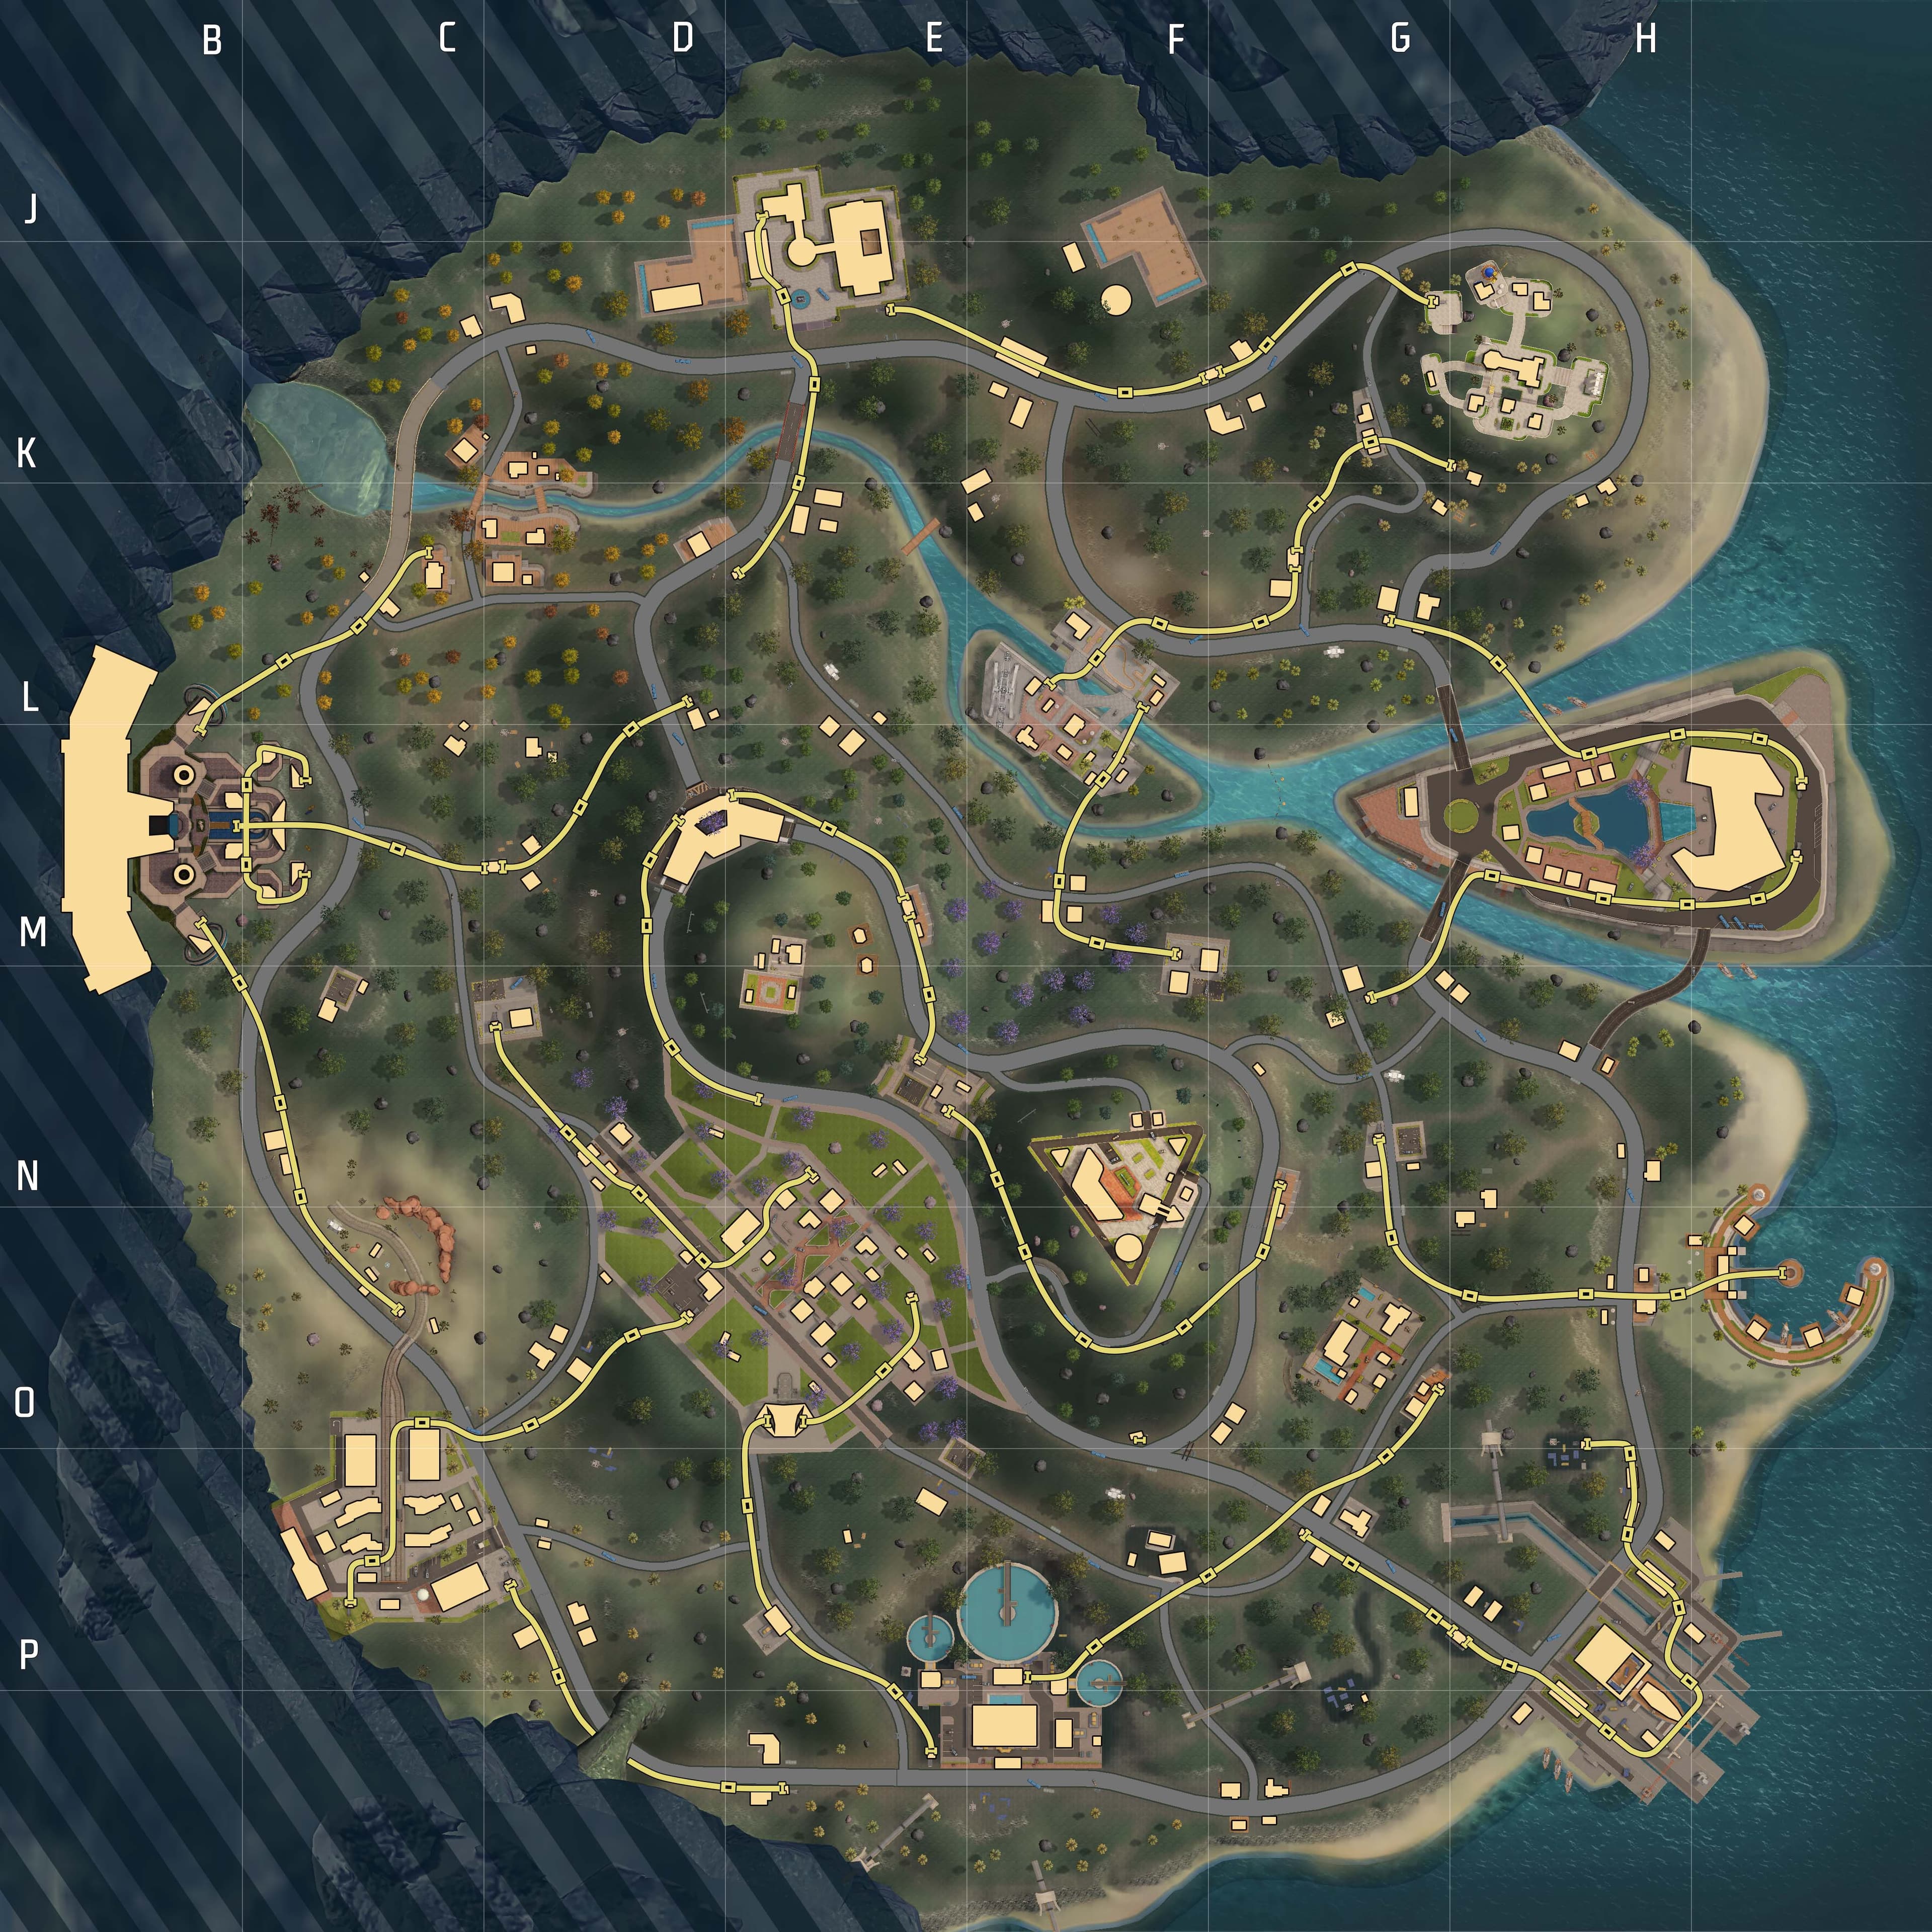
Solara is carefully constructed to balance drop-point selection with rapid safe-zone rotations. Controlling dynamic mechanics is crucial, and utilizing strategic heights allows squad structures to hold high-percentage control zones during closing phases.
Solara is a thriving modern metropolis built around a bustling coastal port economy. The city's eclectic mix of entertainment venues (Funfair, Studio), marine infrastructure (Bayside, Aquarium), and civic amenities (TV Tower, Bloomtown) reflects a wealthy urban population now evacuated, leaving only armed combatants amid the neon and concrete.
Analyze high-traffic zones, drop safety ratings, and ideal combat styles for each notable location.
Central amusement park with rich loot scattered across fairground rides and buildings. The chaotic terrain of carnival structures creates disorienting close-range combat. One of the map's most exciting and dangerous drops.
Tall broadcast tower providing commanding sightlines across the eastern districts. Premium high-ground for sniping. Intensely contested due to its decisive positional value.
Eastern island zone separated by coastal water. Rich loot density and the challenge of controlled water-crossing creates high-stakes early combat. Slide system access to the island is a primary tactical consideration.
Northern motorsport club with garages and track facilities. Solid loot spread and slide system access. A balanced opener for squads who want to gear up before attacking Windmill or Funfair.
Northern wind energy complex with elevated turbine structures. Good loot and high-ground advantage over the northern coastal zone. Slide system connections make Windmill a mobile tactical anchor.
Central residential district with urban building density and consistent loot. Key mid-game position between Funfair and TV Tower. Teams controlling Bloomtown influence both the central and eastern safe zone collapses.
Eastern luxury residential complex. Strong defensive buildings and medium-tier loot. A staging ground for squads planning to assault or defend Delta Isle and Aquarium.
Far-eastern marine exhibit complex overlooking the coast. Elevated glass structures provide sightlines across the eastern approaches. A premium late-game defensive position near the eastern safe zone edge.
Southern coastal bay with maritime structures and moderate loot. Slide system access points allow fast movement toward Eco Drain and Studio. A calm early zone with aggressive rotation potential.
Western media production studios with large indoor filming spaces and equipment. Low traffic and decent loot. The enclosed studio buildings provide excellent defensive positions for passive squads.
Southern drainage infrastructure zone with industrial structures. Very low early traffic with useful loot. A clean opener for passive strategies — slide system access allows rapid repositioning.
Central-west iconic arch structure serving as a map landmark and rotation reference point. Moderate loot in surrounding buildings. The archway frames key sightlines toward Funfair and Bloomtown.
Northwestern natural waterfall feature with surrounding forest and lower-density buildings. A calm, scenic loot zone rarely contested in early phases. Good for passive squads rotating toward Riders Club.
Western transport hub with multiple buildings and slide system entry points. Balanced loot and excellent connectivity to the map's western zones. A neutral staging area for squads adapting rotation mid-match.
Detailed gameplay walkthroughs tailored for competitive squad configurations and beginner adaptation.
Solara's slide system makes zone rotations fundamentally faster than foot-movement maps. Use slides to move between zones in the mid-game — but be aware that slide exits are predictable and can be ambushed. The coastline offers water-route alternatives for squads who want less predictable rotations. Final circles on Solara tend to collapse toward the map's central zone around Funfair and Bloomtown.
Land at Waterfall, Studio, or Eco Drain for a calm start. Learn the slide system entry and exit points early — it is the single most important map-specific mechanic to master on Solara. Avoid Funfair and TV Tower until you are comfortable with the map's urban terrain.
Open at Delta Isle for premium early loot, use slide system access to the island strategically, then rotate to TV Tower when the safe zone allows. Funfair control in the mid-game provides loot and a central staging position that allows pressure in any direction. Weather events are an opportunity — push aggressively when visibility drops to exploit confused static defenders.
Load Solara onto the interactive tactical planner to draw squad routes, custom drop markers, and rotation targets.
Solara's slide tracks are not just a travel convenience — they are a tactical layer. Learn which slide lines feed into which zones so you can use them to reposition faster than foot-rotating enemies. Slide exits are predictable, so station squad members at key dismount points to intercept enemies.
Dynamic weather events on Solara can suddenly reduce visibility across open zones. When fog or rain sets in, reposition proactively — the reduced visibility is an advantage when pushing but a liability when holding static positions.
Like Peak on Bermuda, TV Tower provides sightlines that change the eastern half of the match. Squads who hold it deny eastern rotation and can snipe safe zone approaches with impunity.
Solara's winding coastline offers water-route flanks that most squads overlook. Swimming or boating between coastal landmarks like Bayside, Aquarium, and Delta Isle can bypass fortified overland positions entirely.
Common tactical queries regarding map details, drop tactics, and strategic considerations.
The Slide System is a network of elevated slide tracks spread across Solara's map. Players can ride these slides for fast traversal between zones, significantly reducing rotation time compared to foot movement.
Yes — Solara features a dynamic weather system that periodically introduces fog and rain, reducing visibility across open terrain. These weather events create tactical opportunities for pushes and can disadvantage squads holding static defensive positions.
The central zone around Funfair and Bloomtown is the most common final circle location. Establish a position in Bloomtown with high-ground access to Funfair before the late game and defend against slide-system rotations from all directions.