hot dropaggressive
The Sub
Submarine facility in the south with high-grade military loot. A top-tier hot zone with consistent multi-squad landings. The facility's enclosed corridors favour shotguns and SMGs.
The Desert Arena — Verticality, Snipers & Rugged Terrain
Kalahari is Free Fire's high-intensity desert map, designed for players who favour vertical terrain, long-range sniping, and resource scarcity. Rocky ridges, canyon valleys, and abandoned facilities create a map where elevation control and sniper positioning are decisive factors. The open desert spaces between landmarks expose careless rotations — every movement must be deliberate and covered.
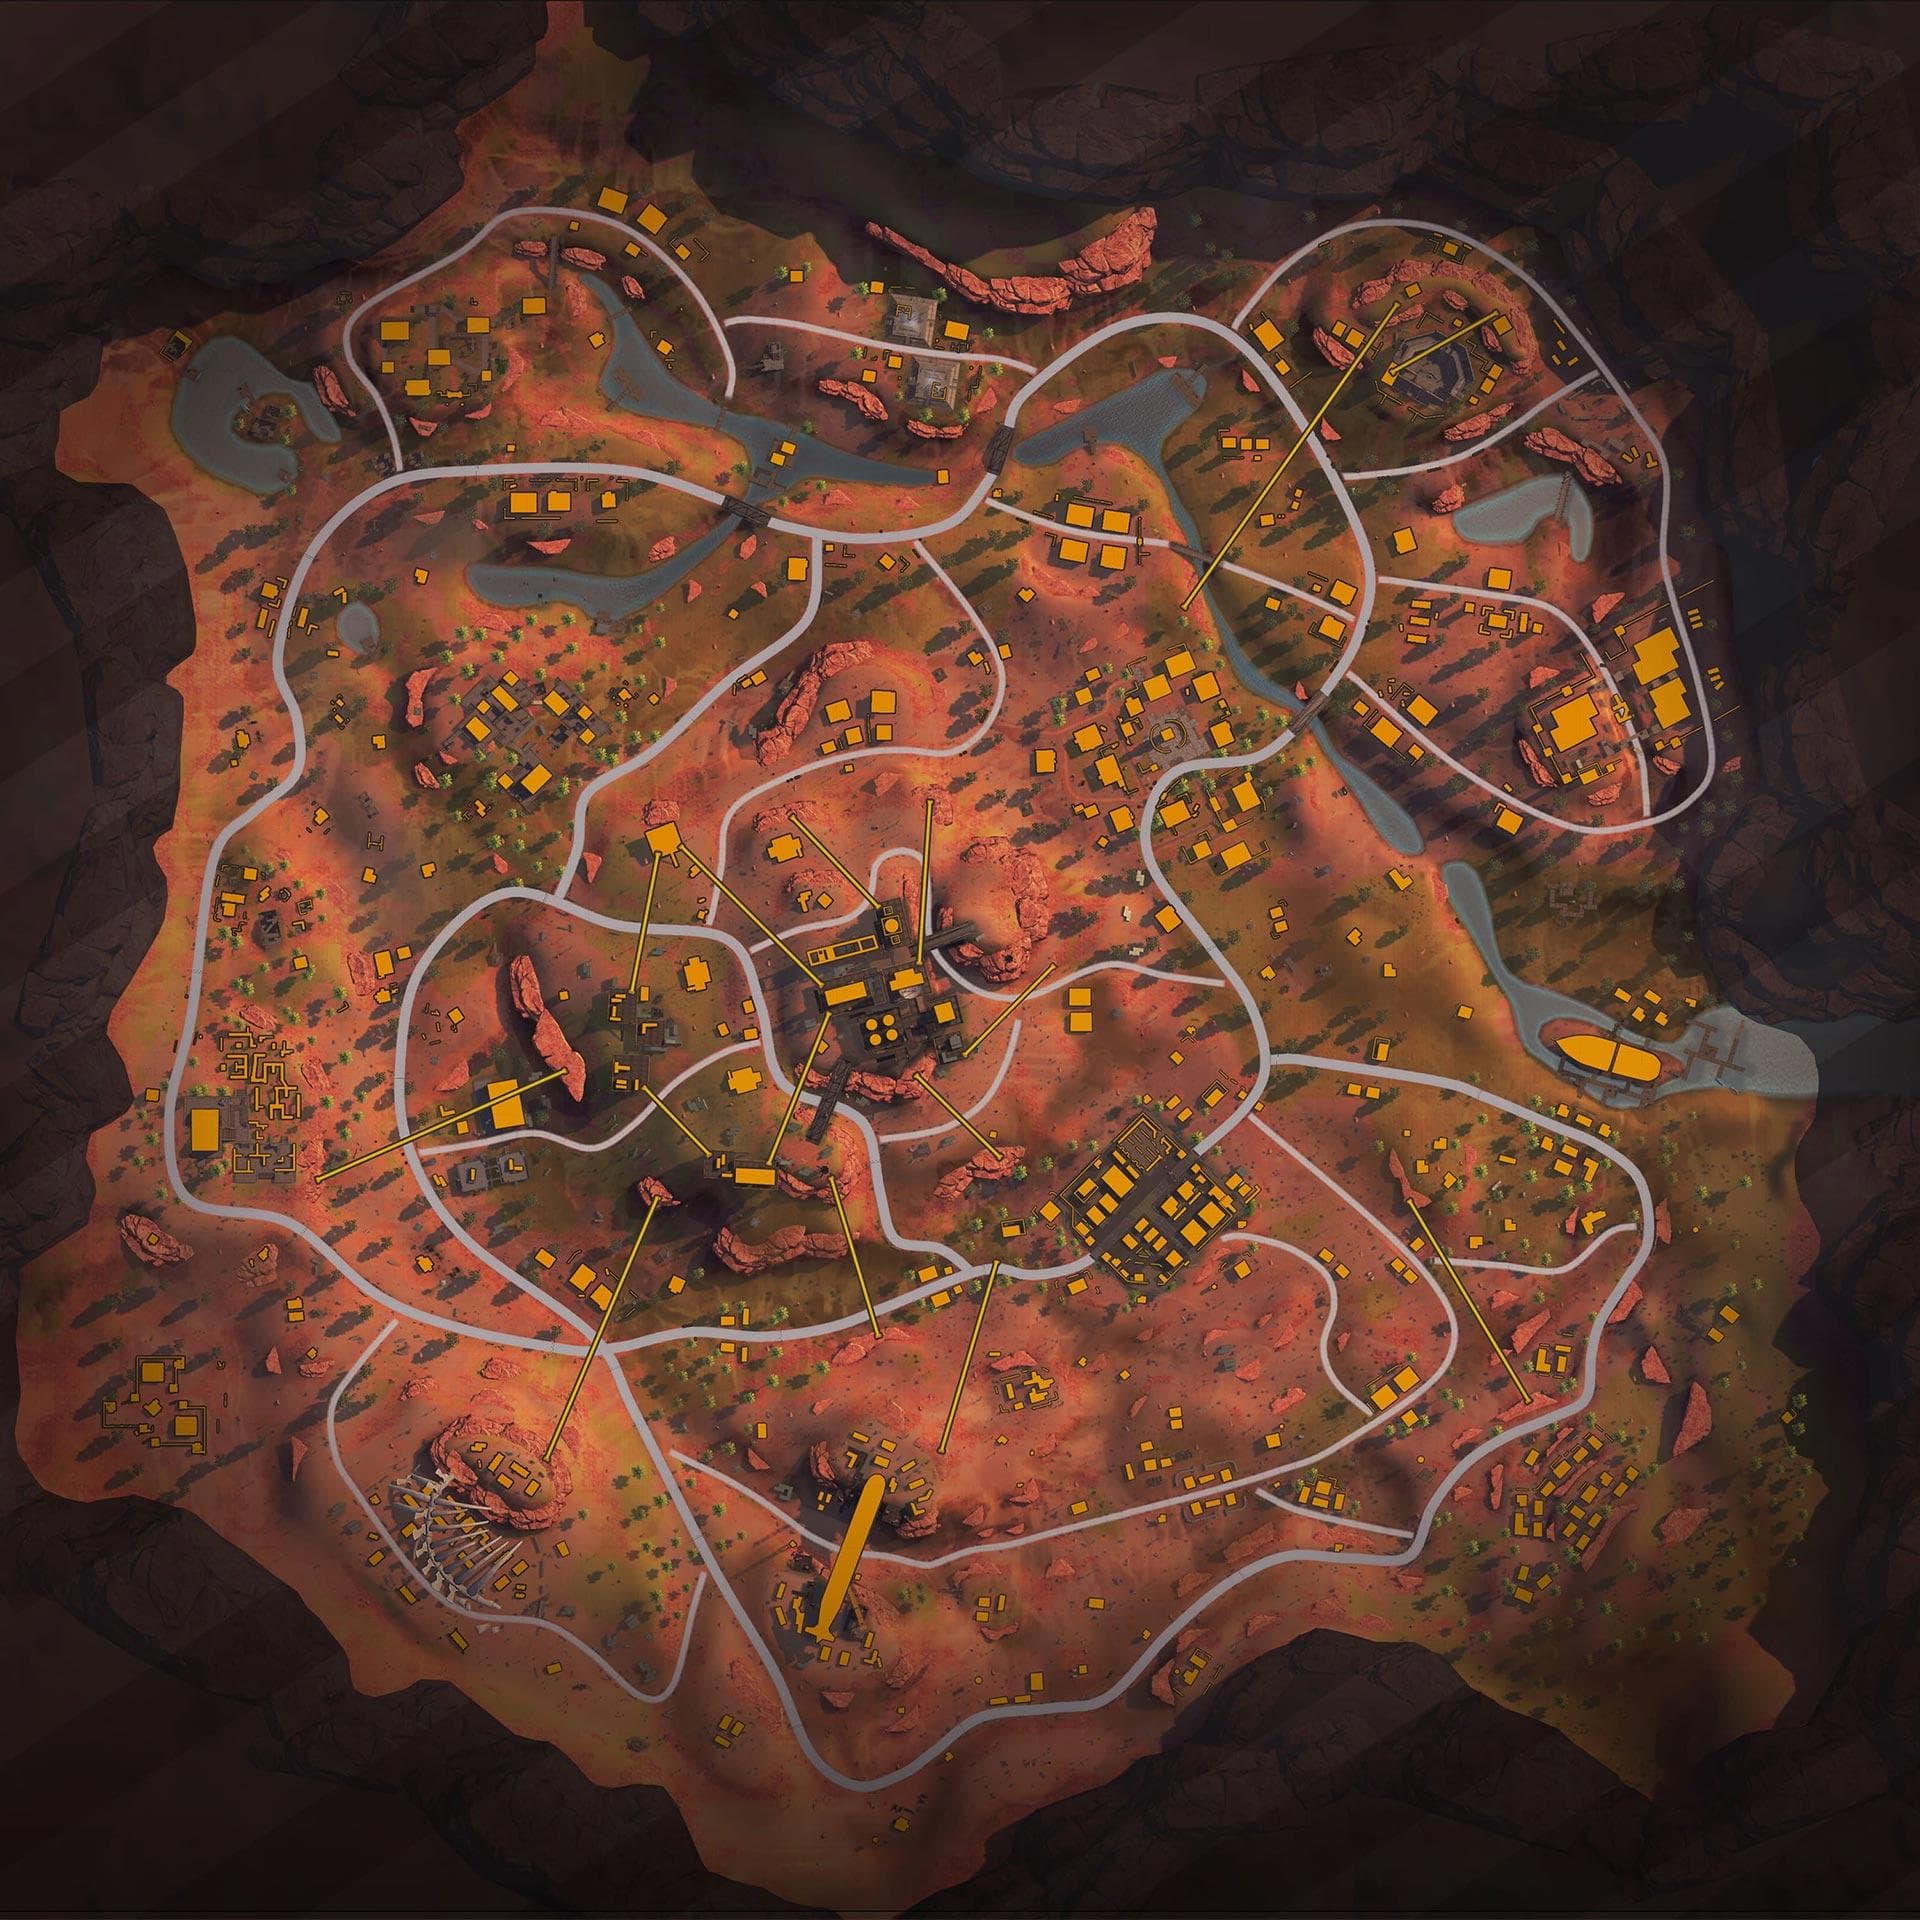
Kalahari is carefully constructed to balance drop-point selection with rapid safe-zone rotations. Controlling dynamic mechanics is crucial, and utilizing strategic heights allows squad structures to hold high-percentage control zones during closing phases.
Named after southern Africa's vast semi-arid Kalahari Desert, the map captures an atmosphere of desolation and frontier survival. Ruined military installations, abandoned research outposts, and crumbling desert settlements tell the story of a region once active with human ambition, now reclaimed by sand and silence. The Council Hall and Command Post hint at military occupation, while Old Hampton and Santa Catarina suggest civilian settlements caught in the conflict.
Analyze high-traffic zones, drop safety ratings, and ideal combat styles for each notable location.
Submarine facility in the south with high-grade military loot. A top-tier hot zone with consistent multi-squad landings. The facility's enclosed corridors favour shotguns and SMGs.
Central industrial refinery with the map's best loot concentration. Verticality inside the facility creates complex multi-level combat. An essential zone for squads willing to fight for map control.
Military command facility in the map's southeast. Heavy loot and strong defensive structures. Teams that control Command Post often dictate late-game positioning in the eastern zone.
Eastern coastal zone with warehouses and jetties providing good cover. Moderate loot and lower competition than The Sub. A balanced opener with clear rotation paths to Refinery and Command Post.
Eastern settlement with urban combat opportunities across interconnected buildings. Good loot density and predictable rotation corridors toward Stone Ridge and Command Post.
Southeast rocky highland with natural stone cover and sniper-friendly elevations. Medium-tier loot but excellent defensive potential. A premium late-game holding position.
Eastern facility with enclosed structures and good loot. Tight indoor corridors shift combat to close-range. Solid rotation anchor for eastern squads.
Northern administrative complex with medium loot spread across multiple rooms. Low early traffic. A calm opener for squads who want to avoid the central Refinery brawl.
Central-west construction site with exposed platforms and scaffolding. Risky movement due to open structures, but loot density is high. The elevated scaffolding creates unique verticality.
Northern desert shrine complex with scattered loot and minimal traffic. Ideal for passive players who want to gear up quietly before rotating toward Council Hall or Bayfront.
Northwestern abandoned town with old-world architecture and calm loot conditions. Rarely contested — perfect for rank-push strategies that prioritise survival over early engagements.
Labyrinthine rock formation in the west. Disorienting terrain creates intense close-range ambushes. Loot is moderate but the tactical complexity rewards players who know the layout.
Southwest zone with large industrial structures and calm early conditions. Decent loot and predictable rotation to The Sub. A reliable safe-start option for survival-minded squads.
Detailed gameplay walkthroughs tailored for competitive squad configurations and beginner adaptation.
On Kalahari, rotate along ridgelines rather than through open desert. Use vehicles for long-distance repositioning and dismount before entering rocky terrain where enemy snipers may have set up overwatch. Prioritise elevation transitions — moving from valley to ridge is more valuable than lateral movement at the same height.
Land at Old Hampton, Shrines, or Mammoth. These quiet zones allow full gear collection before you engage. Avoid Refinery and The Sub until you are comfortable with sniper mechanics and vertical terrain navigation. Securing a vehicle early is a high priority on this map.
Rush Refinery for the best loot, establish a sniper on the highest accessible elevation, and lock rotation corridors while your squad guards flanks. Use Foundation's scaffolding for unexpected vertical angles on squads crossing below. In the final circle, Refinery or Stone Ridge elevation is worth contesting hard.
Load Kalahari onto the interactive tactical planner to draw squad routes, custom drop markers, and rotation targets.
Rocky ridges and cliff tops dominate Kalahari's tactical landscape. Squads holding elevated positions have sightlines across multiple zones and can intercept ground-level rotations. Fight for high ground immediately after looting.
The open ground between landmarks is a kill zone. Always use vehicles, Gloo Walls, or terrain features when crossing. Move zone-to-zone along ridgelines and canyon edges rather than cutting across exposed flat land.
On Kalahari, a squad without a sniper is at a severe disadvantage. The long sightlines between elevated positions make sniper suppression a necessary tactical layer — even one skilled long-range player fundamentally changes your squad's capability.
The team that holds Refinery in the mid-game controls access to the central zone and can apply pressure in any direction. Contest it early or avoid it entirely and flank — there is no neutral middle ground.
Common tactical queries regarding map details, drop tactics, and strategic considerations.
The combination of open terrain exposure, mandatory sniping knowledge, and complex vertical terrain navigation demands a higher skill floor than Bermuda or Purgatory. Squads who do not understand positioning and elevation are quickly punished.
Yes — Refinery, The Sub, and Command Post all reward aggressive early-game squads with top-tier loot. But aggression must be paired with vertical awareness; rushing through open ground without cover is frequently fatal.
Secure a vehicle at your drop zone and use it to cross open desert zones quickly. Dismount before reaching rocky terrain — vehicles become liabilities in complex vertical environments.